This method is useful for devices that cannot install proxy software directly. If the device's network settings support proxy configuration, you can share the proxy connection from your computer. This guide uses the Switch as an example.
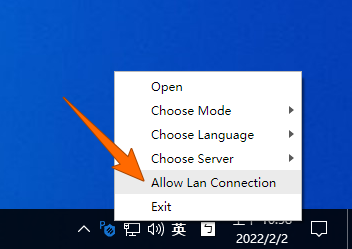
1. After selecting and connecting to a node on the V2net desktop app, right-click the system tray icon and check the box labeled "Allow LAN Connections". If a firewall prompt appears, make sure to allow it.

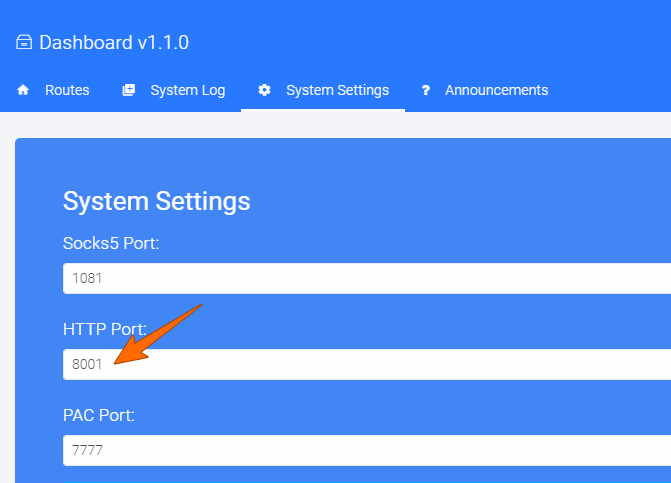
2. Click "System Settings" in the V2net desktop app and take note of the "HTTP Port" for later use.

3. Find your computer's current LAN IPv4 address and write it down. Here's how to find it:
Windows: Press Windows + R to open the "Run" dialog, type cmd, and press Enter. In the Command Prompt, run the following command:
ipconfig | findstr /i "ipv4"
macOS: Press Command + Space to open Spotlight, search for Terminal, open it, and run:
ifconfig | grep "inet " | grep -Fv 127.0.0.1 | awk '{print $2}'
4. On your Switch, go to Settings → Internet → Internet Settings. Choose the WiFi network connected to the same router as your computer and select Change Settings.
In the WiFi settings, locate and enable Proxy Settings. Fill in the following fields:
Server: Enter the computer's IPv4 address
Port: Enter the HTTP Port you found in the V2net app
Example: 192.168.1.5 and 8001
Make sure the Auto-Authentication option is turned off.
5. Once the setup is complete, your Switch will be able to use the proxy connection from your computer. The same setup method can be applied to other devices as well.
